Wednesday, March 16, 2016

Lucking out with neighbors... PORK!

We recently sold our house in the "burbs" and bought a small house with a few acres out in the sticks.  I was pleased to find out that our next door neighbor's significant other is a life-long farmer who raises cattle, pigs, etc...  At some point in the next few years, I hope to raise a few wiener pigs (pigs that you get when they are very young for the purposes of slaughtering and butchering them for your own use) for our family.  It'll sure be handy to have someone close-by to run ideas when it comes to doing it ourselves.

In the short-term, we're hoping to get chickens for eggs this spring and perhaps next spring, we'll do a run of 30 broiler chickens for our own meat.  That's the plan at least.

In the meantime, I recently managed to get my Big Green Egg setup and ready to go after our move.  I can't tell you how happy this makes me as I've been unable to fire up the smoker in anger for months on end.

To celebrate, I did some BBQ this past weekend.  Down south, that means pulled pork.  As such, I secured a couple 8lb boston butts (you'll remember from the butchering posts that this actually isn't from the butt area of the hog, but instead its the top part of the shoulder area).

The process is pretty simple when you break it down - put some kind of spice rub on the meat.  Get your cooker set for indirect (like oven heat as opposed to grilling heat) cooking and get the temp to about 225-250 degrees.

Rubbed with Harvest Eating Carolina BBQ Rub
It also wouldn't be proper to do it without smoke.  As such, you need some means of putting smoke in the cooking chamber.  Wood is generally the answer - be they chunks, chips, or logs.  In my case, since I lost all my hardwood in the move (donated to a friend who had a wood burning stove), I made up some foil packets to put pellets in (the same pellets I used when I smoked the ham, bacon, and sausage last year).   made little foil pouches full of the pellets and tossed them on the coals.  This seemed to work fine but I'd like to experiment some more on packet design and placement.

At any rate, the idea is to "smoke" those butts until you have reached an internal meat temperature of about 190-205 degrees.  At a cooking temperature of 225, that can take upwards of 1.5-2 hours per pound.  I put mine on the Egg at about 1am and they came off about 15 hours later.

When the meat draws back off the bone, your getting close!
I was a little concerned; this being the first cook in the new place, as we get a great deal more breeze here and I wasn't sure how much that would affect the temperature fluctuations.  I sat up too late to babysit... in the end, the Egg did what it always does.  Once you get it adjusted, you just leave it be and it does its thing.  That afternoon, it was time to get them off the grill, let them cool, and pull the pork.

This was a cool pull for me because my five year old pitched in.  Pulling is a pretty labor intensive process that requires you to essentially pull the pork meat apart in strands/shreds.  Some folks like to use big knives and chop it all up but I don't like the texture that way and feel like it dries out too quickly.  That's just my opinion - and in the world of BBQ, everyone has one.

The end result, after all the cooking, fat rendering, bone-removal, and trimming during the pulling process, we wound up with about 7lbs of pulled pork.  I see pork tacos in my future!  Left-overs are a wonderful thing and since it takes as long to cook two butts as it does one, you might as well cook plenty.

I may post some additional articles in the coming weeks to talk about some of the specifics of the process.

I'm hungry again just looking at the pictures.


Wednesday, March 25, 2015

Call Me Captain Ham!

Can you smell it?
So its been four weeks.  A long four weeks... Four weeks since that 18 lb ham went into the brine.   I used Pop's Brine recipe from The Smoking Meat Forums.  I'd done some bacon in the same exact recipe and been pretty thrilled with the results.

The process consisted of mixing up the brine which was 1 cup of non-iodized table salt, 1 cup of brown sugar, 1 cup of regular sugar, and 1 ounce of Cure #1 pink salt (by pink salt, I DO NOT mean Himalayan salt - this is curing salts which is something totally different - google it if you are unsure what I mean) per gallon of cold water.

Then I did my best to inject brine along the bone lines.  The idea being that you want the ham to cure from the inside out as well as from the outside in.  Pop's recipe states that you should inject anything that is thicker than 2 inches or so.  This ham certainly fit that bill.  Along that line of thought, I injected quite a bit all over the place - since I was told that you can't really over cure by injecting too much.

I submerged the ham in about a gallon and a half of the brine and then weighted it down (to keep it underneath the liquid) with a big old liter beer mug (known as a Maßthat made its way home with me from an evening at the Oktoberfest in Munich many moons ago.  Some people will fill a big ziplock with water and close it to use as a weight - but after reading about one person whose bag opened and diluted the brine, I erred on the side of caution, even if it was somewhat undignified duty for the the trusty old glass mug.

A couple times through the brine process, I turned the ham in the brine to make sure that all surface area of the meat had ample time to be in contact with the cure.  Dunno if it was necessary, but it certainly couldn't hurt.


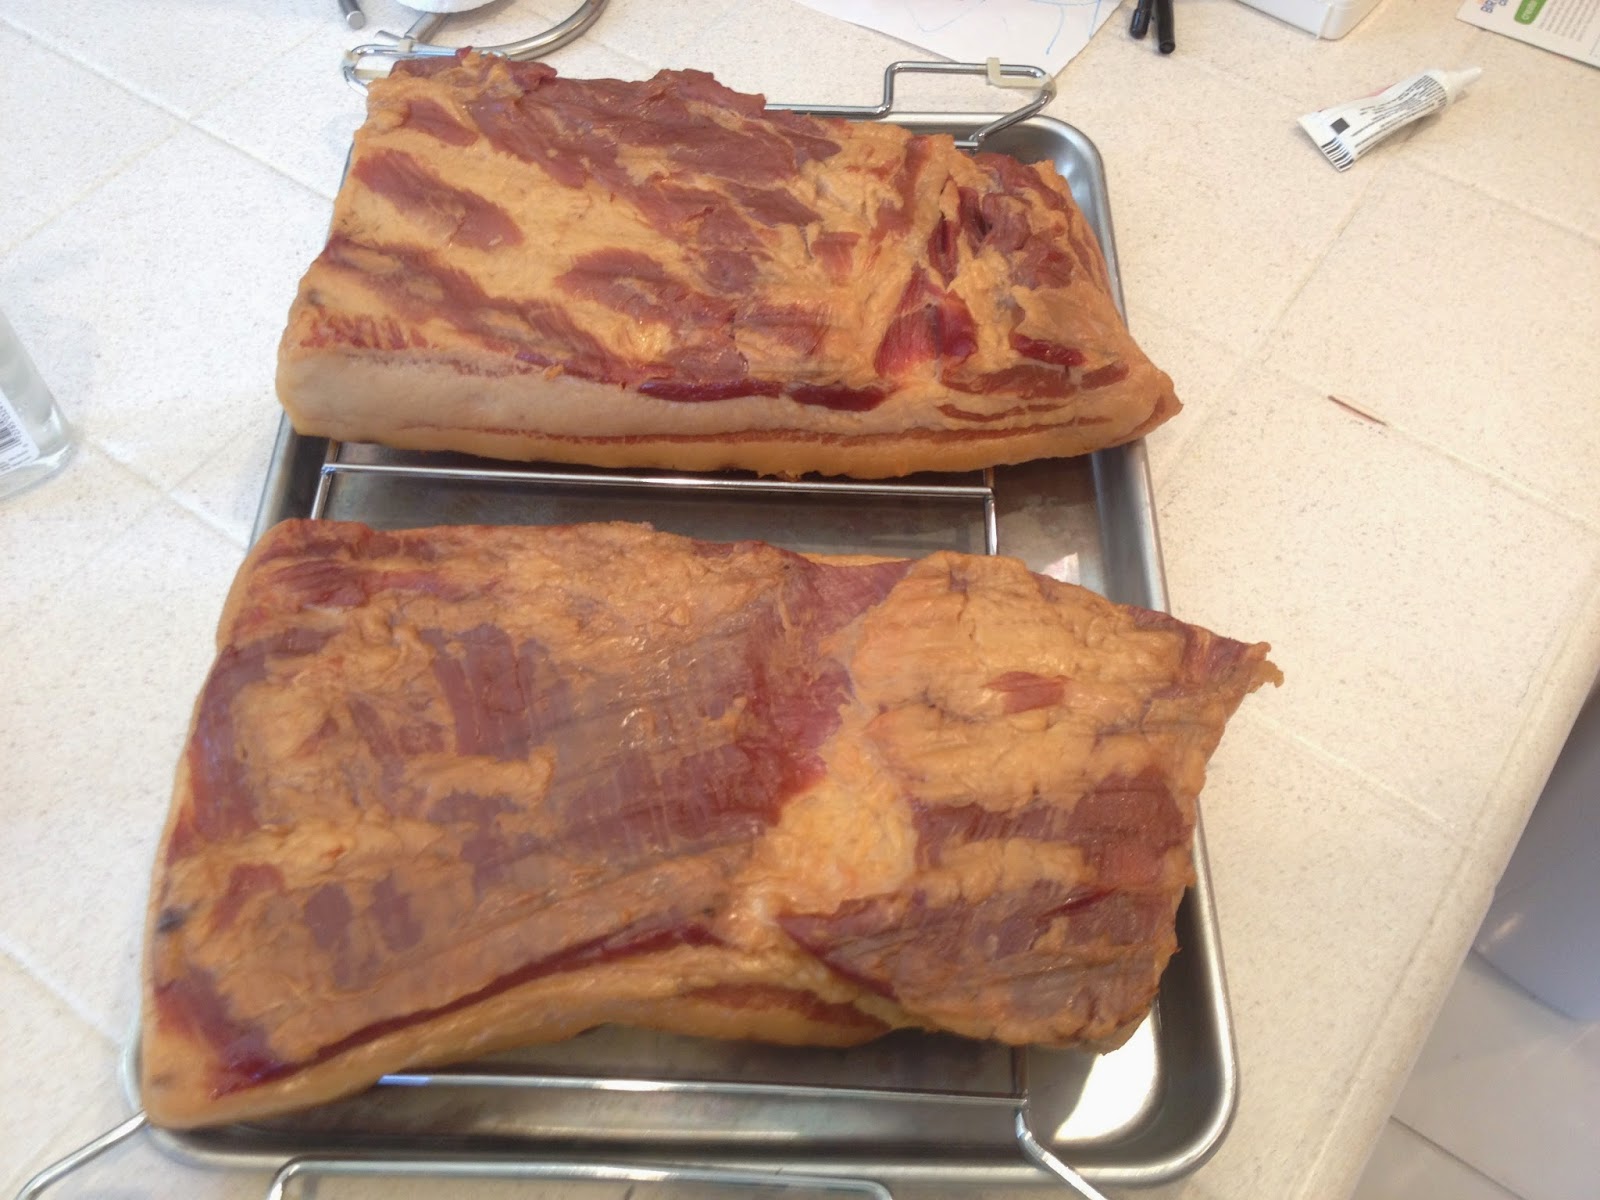
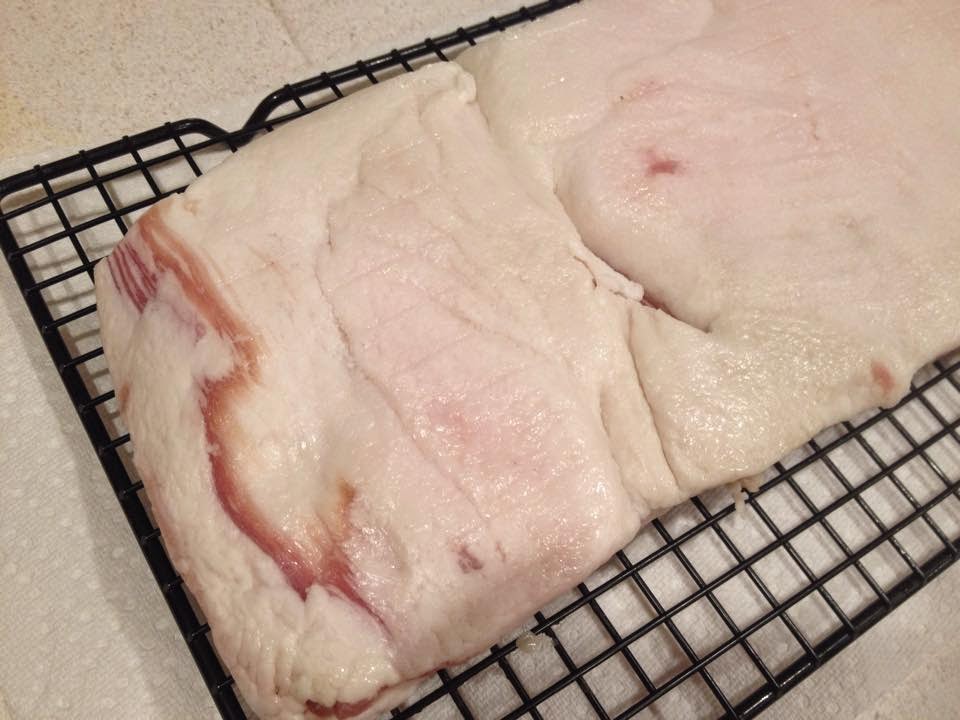
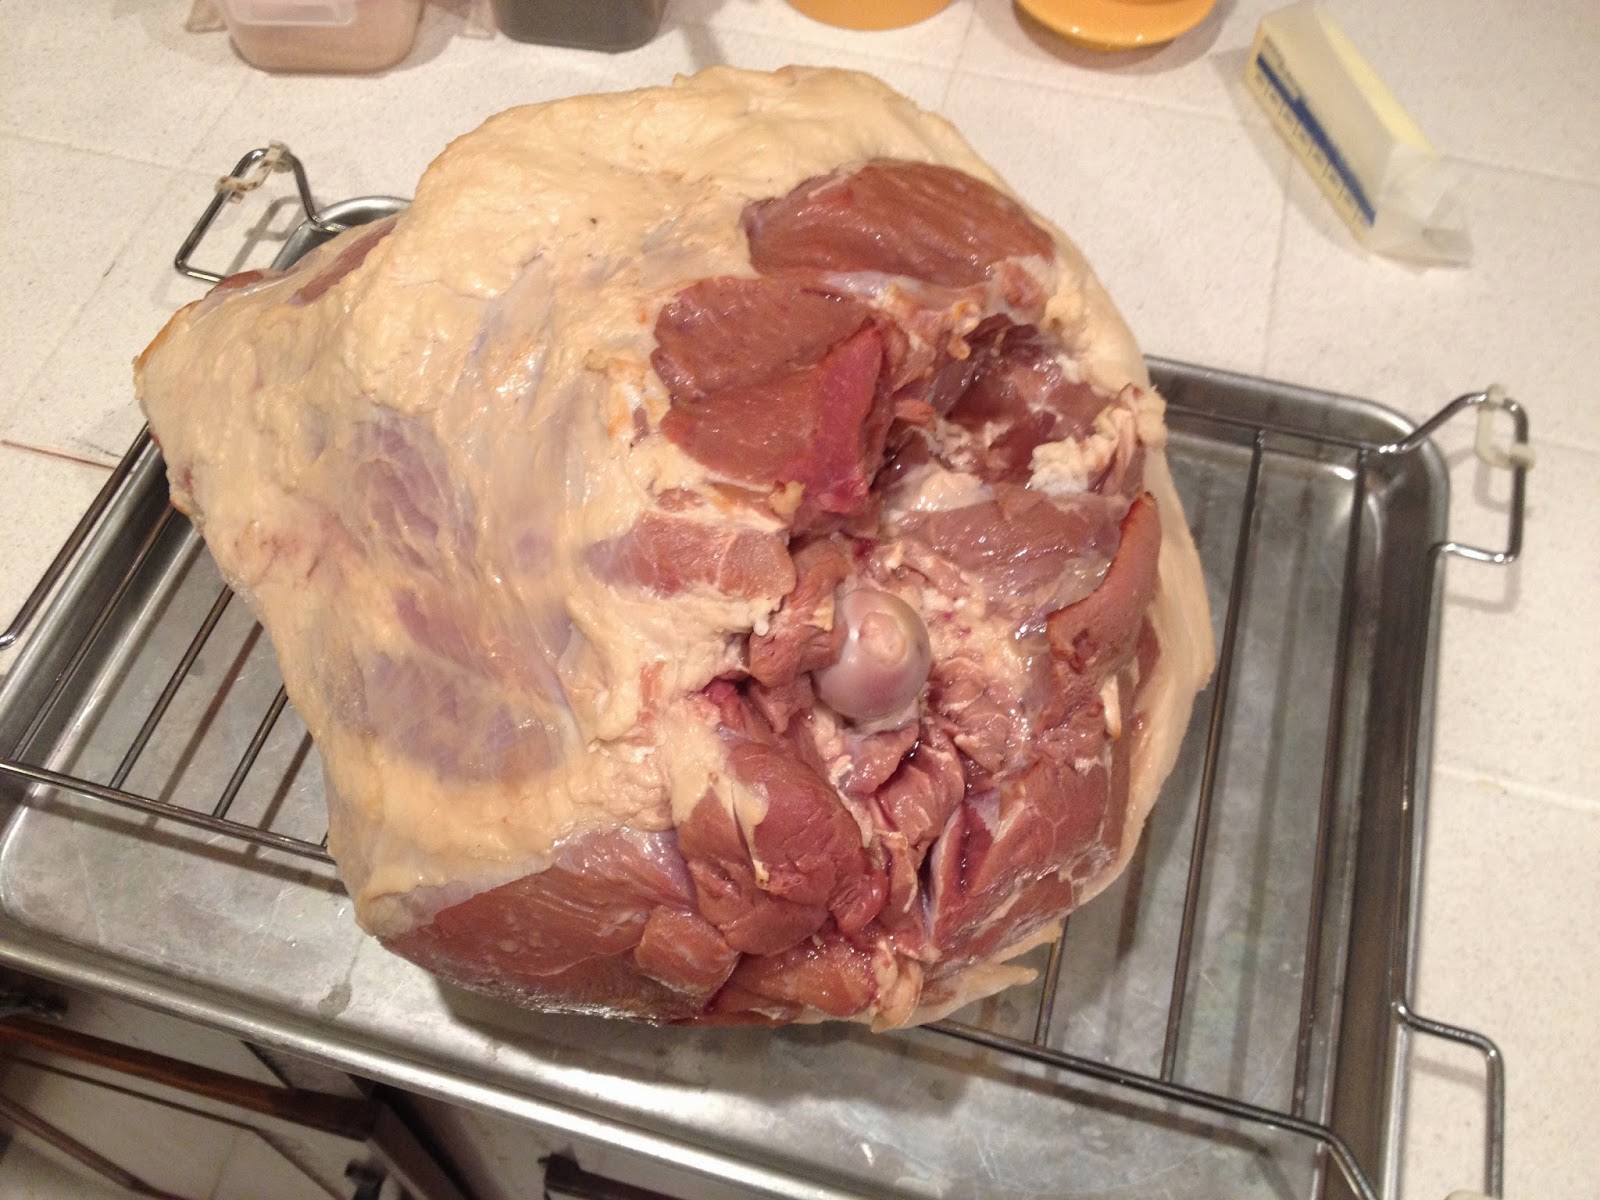
Pardon the lousy novice butcher trimming job!
I had noticed that the salt in the bacon I'd similarly brined was a bit high for my tastes.  So... I thought I'd soak the ham a bit to see if I could take out a bit of the salt.  Why I didn't slice off a piece and fry it up BEFORE soaking in fresh water is quite beyond me.  That's the third time in a row I failed to do a test piece... talk about forgetting the basics!  DUH!

So, I soaked in cold fresh water for about 24 hours with one water change in the middle.

Then, I removed the ham, patted as much of the liquid off as I could and put it uncovered in the fridge for about 36 hours to dry off and develop that tacky pellicle that is supposed to be helpful in getting the smoke to stick to the meat.

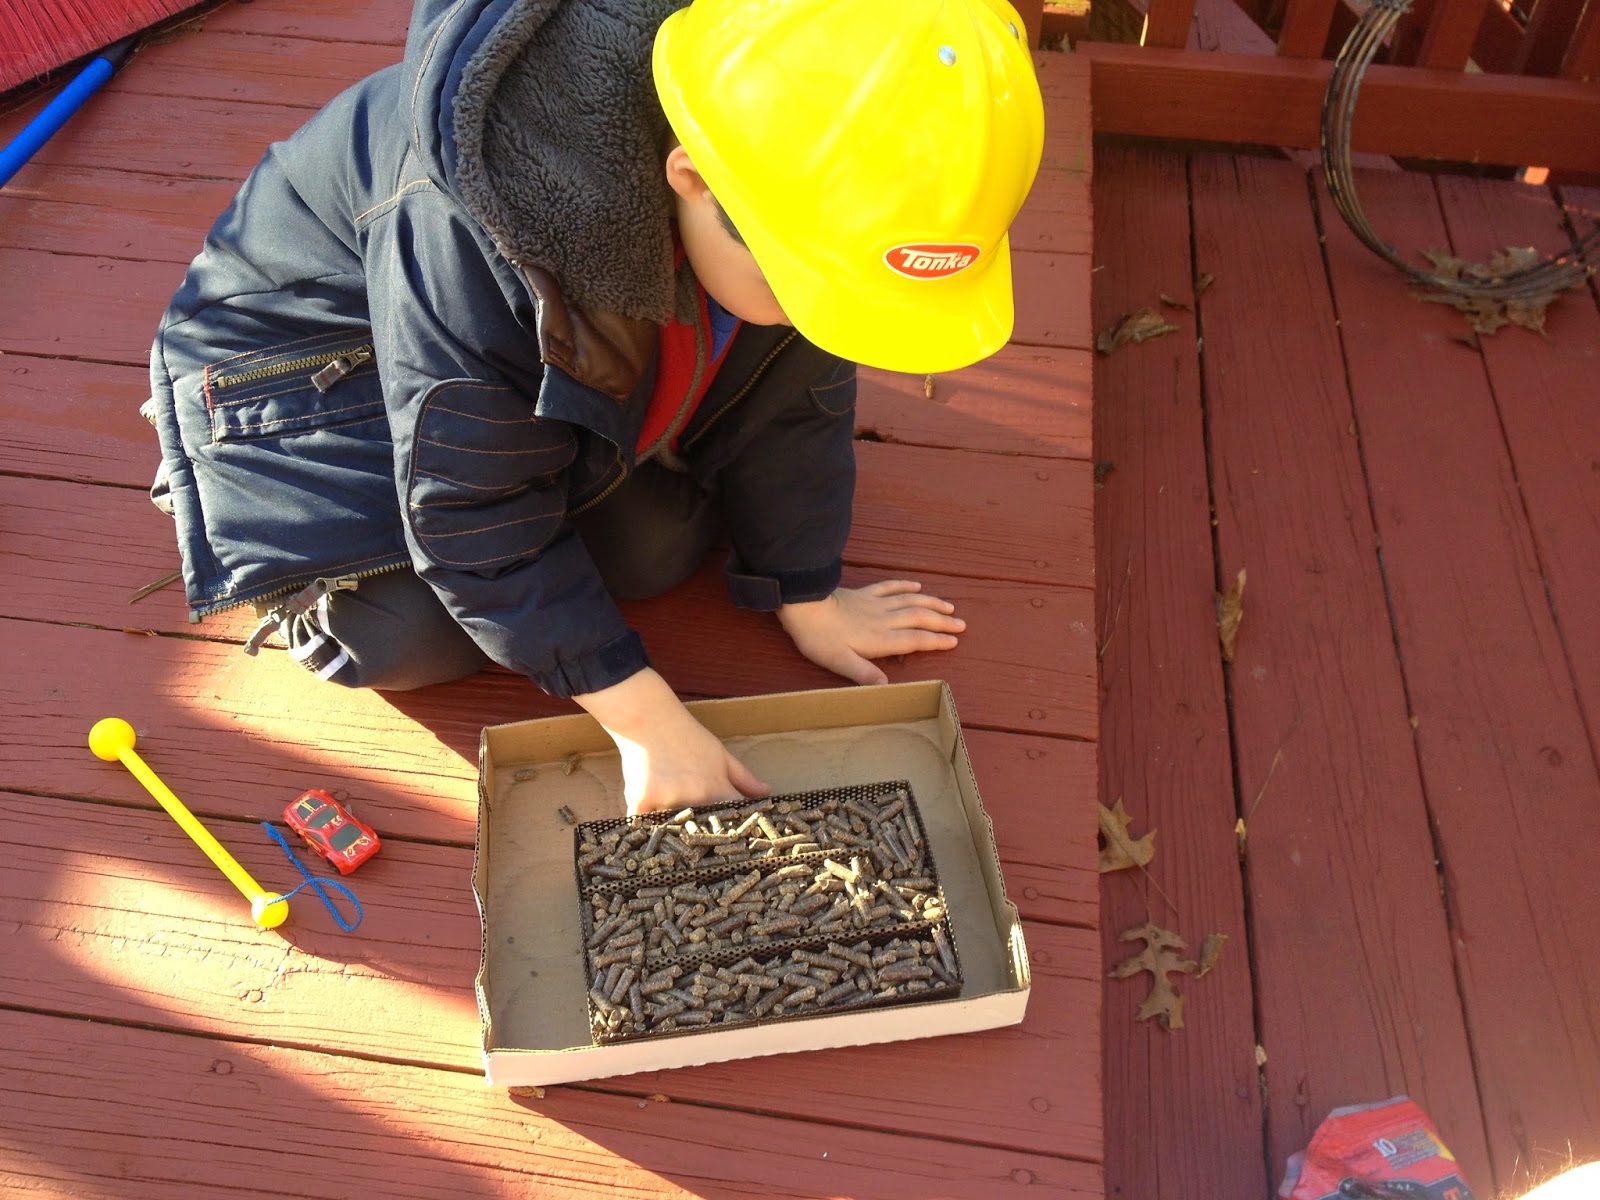
One by one pellet loading keeps your helper busy for HOURS!
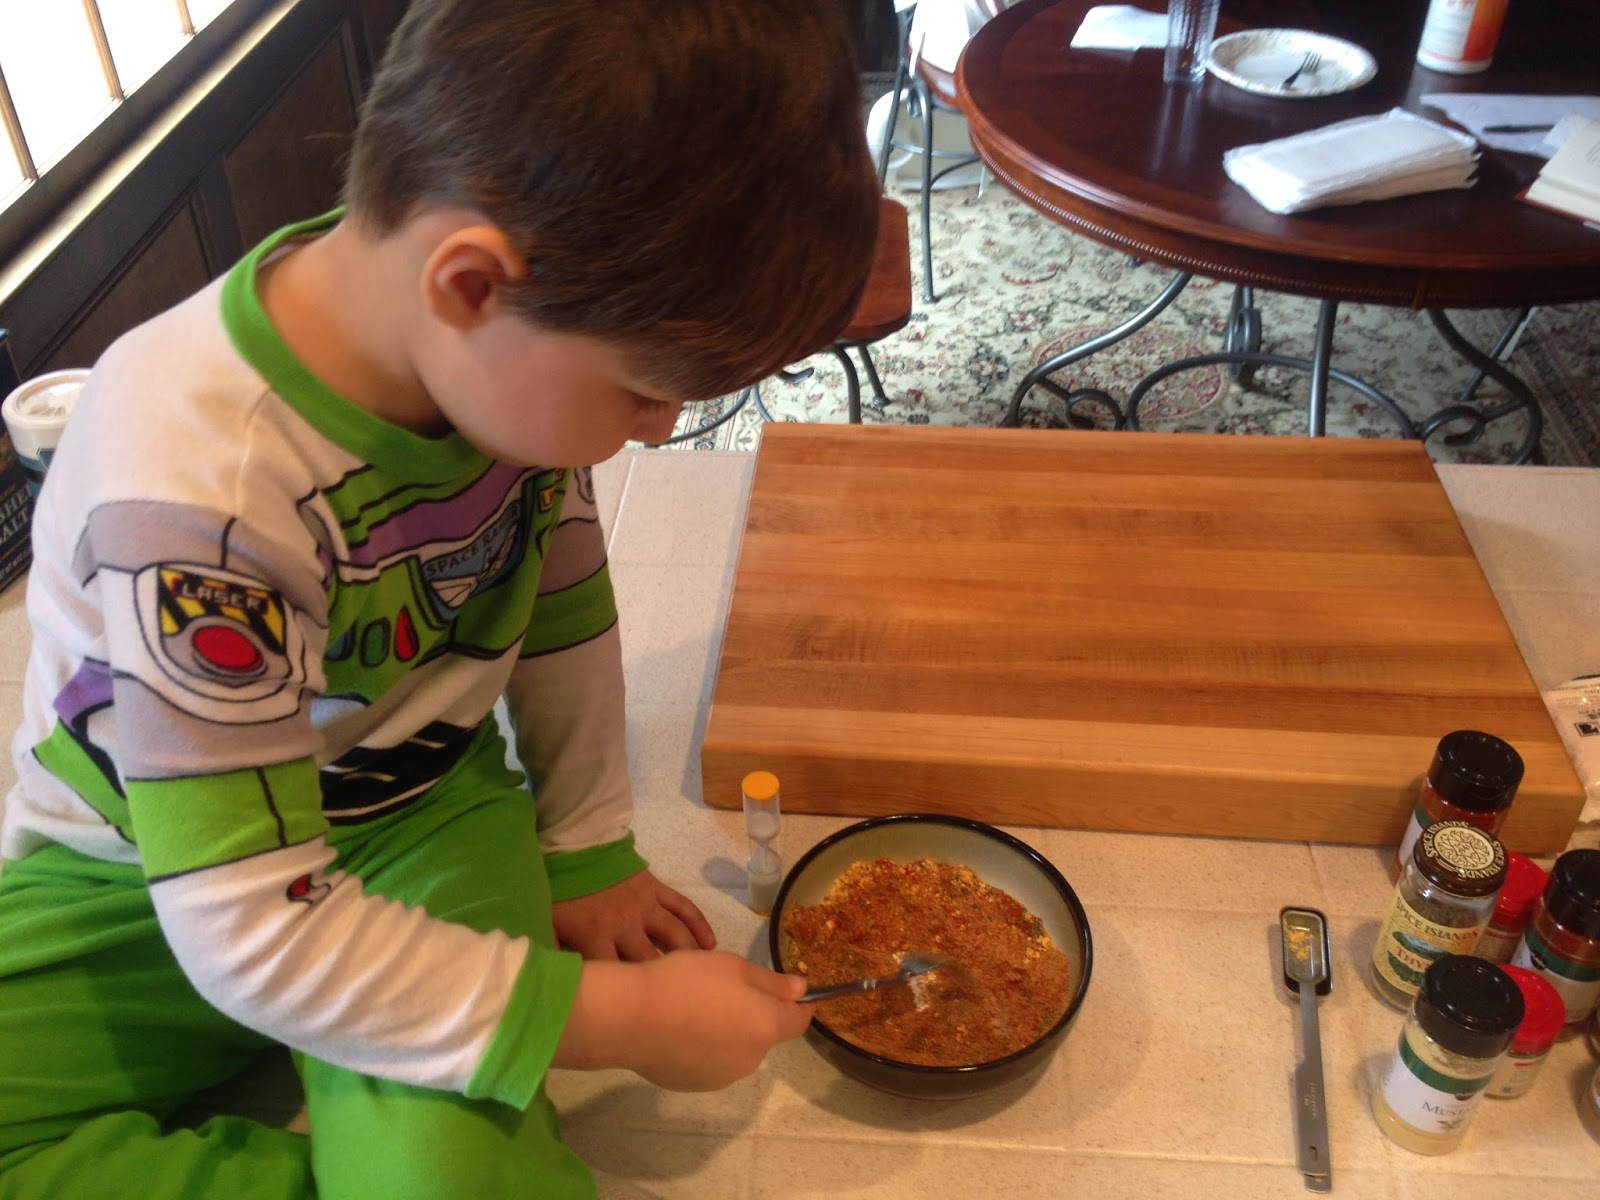
Then I had my faithful assistant load up the Amazen Pellet smoker with a mixture of hickory, cherry, and maple pellets.  Its pretty dangerous work, hence the hard hat.

After that, I cold smoked in the Big Green Egg for about 10 hours.  It was about 60 degrees outside and the internal temperature in the Egg never got above 70 so that certainly qualifies as cold smoking.

My original plan was to cold smoke it a while and then remove it and build a hot smoking fire in the Egg.


You can see a little bit of the brown color from the smoke
However, it looked like the weather was going to get crappy and I didn't feel like building a fire in the rain.  I figured that the ham already had some nice smoke on it so I'd just finish it in the oven.

One thing I did notice (and the same thing had happened to one of the slabs of bacon I'd cold smoked) was once the temp inside the Egg hit a certain point, the meat started to sweat.  I am sure this has to do with ambient temperature, meat temperature, relative humidity, air circulation, and the airspeed velocity of unladen European swallows, but frankly I don't really care that much.  I dobbed up the sweat with a paper towel and kept smoking.

Smells great!
 Once rain was imminent, I declared the cold smoking process "complete" (convenient, eh?) and brought the ham inside to the fridge and let it sit overnight.
**NOTE**  If you place a piece of meat that has been smoked into your fridge for any period of time, your fridge will take on that lovely aroma for a long while.

The next day I cranked up the oven to 250 and cooked the ham until the internal temp was 155 degrees.  This took quite a while (5 or 6 hours?).  After a few hours, I pulled it out, scored the fat cap, and applied a maple-brown sugar glaze.


Pork candy!

In hindsight, next time I may try to trim a little more of the fat off and try harder to keep a uniform fat cap.  The fat tastes SO good that I want to make sure that there is some on every slice if I can help it.  But I don't want so much of it on each slice that people have the urge to trim it off... because they'll trim more than they need to I think.

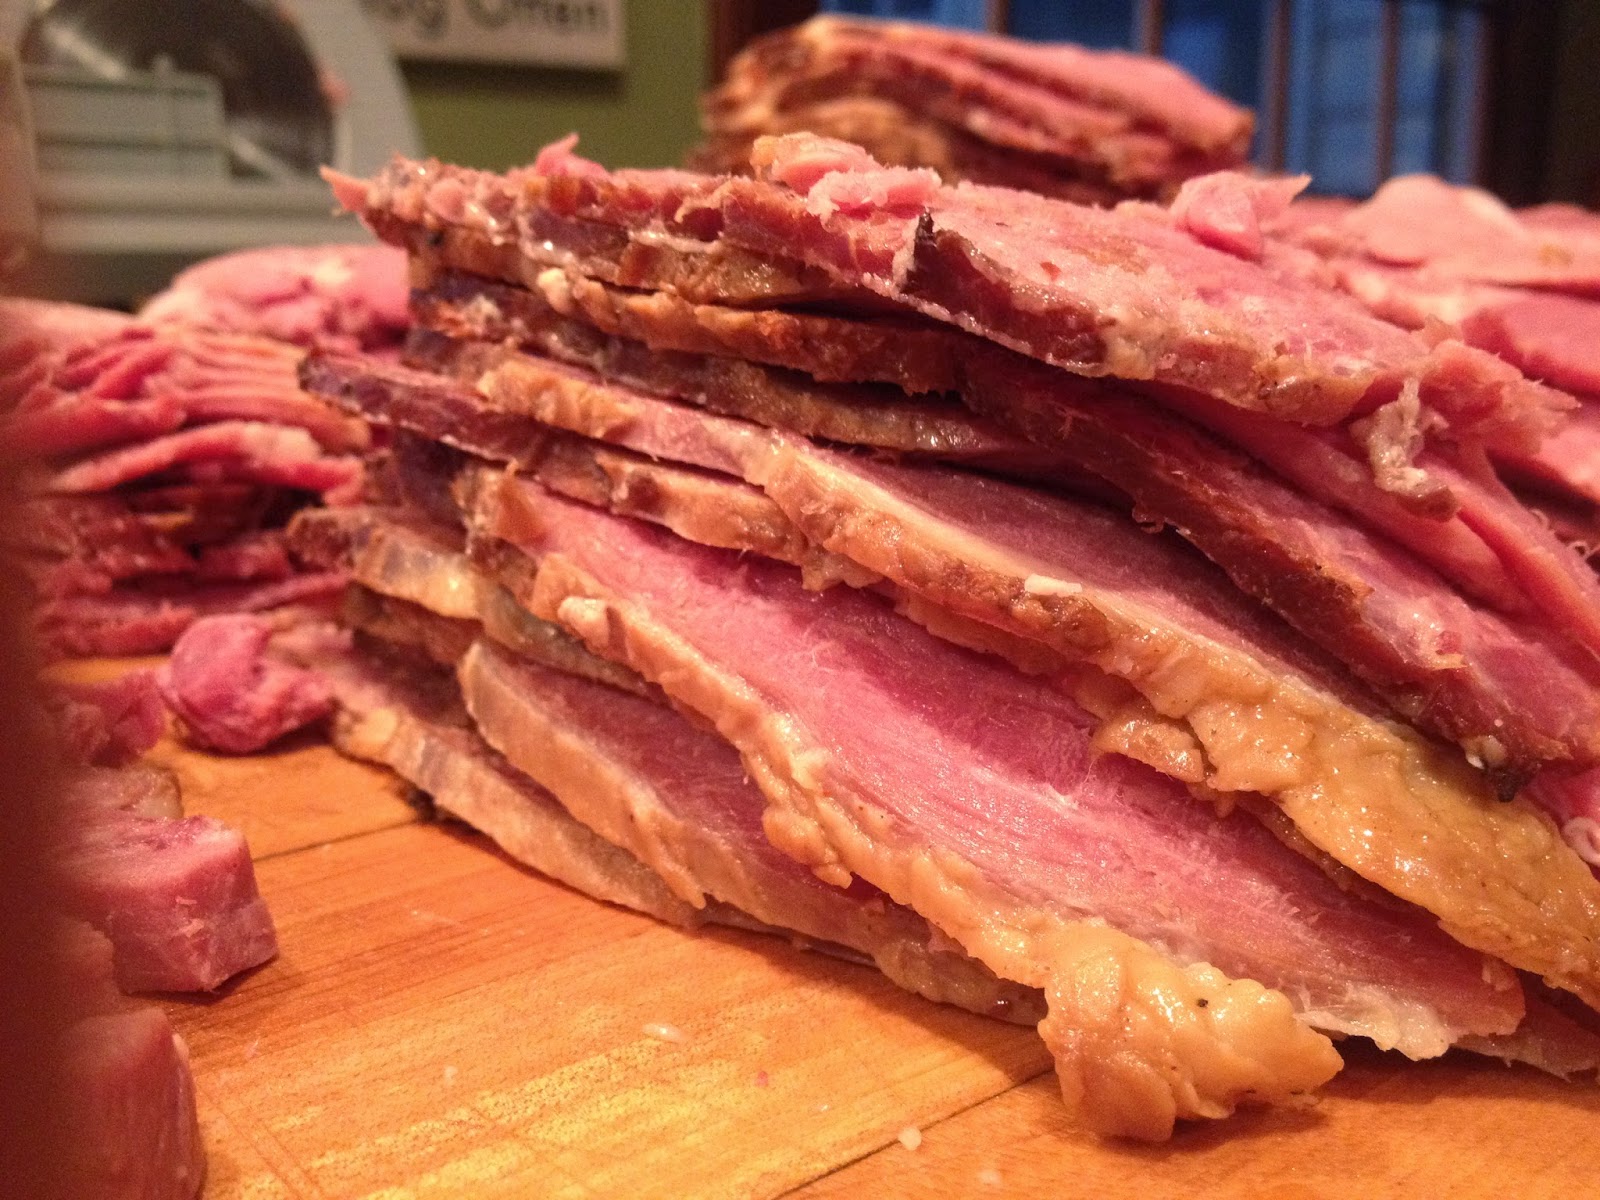
As I started to carve it up (talk about a hack job...), I noticed one small part (about the diameter of a quarter and about 2-3 inches long) that was gray.  I've seen pictures of meat that have failed to cure all the way through and it looked just like that.

That little gray section is the culprit!
You can see what I am talking about to the left.  Basically, its where the brine failed to penetrate.

I smelled it and it smelled like cooked pork.  That said, I generously trimmed around it and tossed that section in the trash.  Given that this was a long cure (28 days), I was worried that if there was any section that wasn't cured completely that it might have soured but I didn't get that impression at all.

I'm pretty confident that it would have been safe to eat given that this was a large whole muscle cure and at no point did that section ever come into contact with air.  And the fact that it was submerged in brine the entire time (aside from the smoking and cooking period), I can't imagine that the risk is high at all.  That said, I didn't want to take any chances so I pitched it.  Had this been a commercial operation, my guess is that they would have had to discard the entire ham... fortunately I'm not subjected to that kind of scrutiny.  I will say that next time, I'll be even more diligent to ensure full brine penetration via injection.

Someone is hovering for scraps.

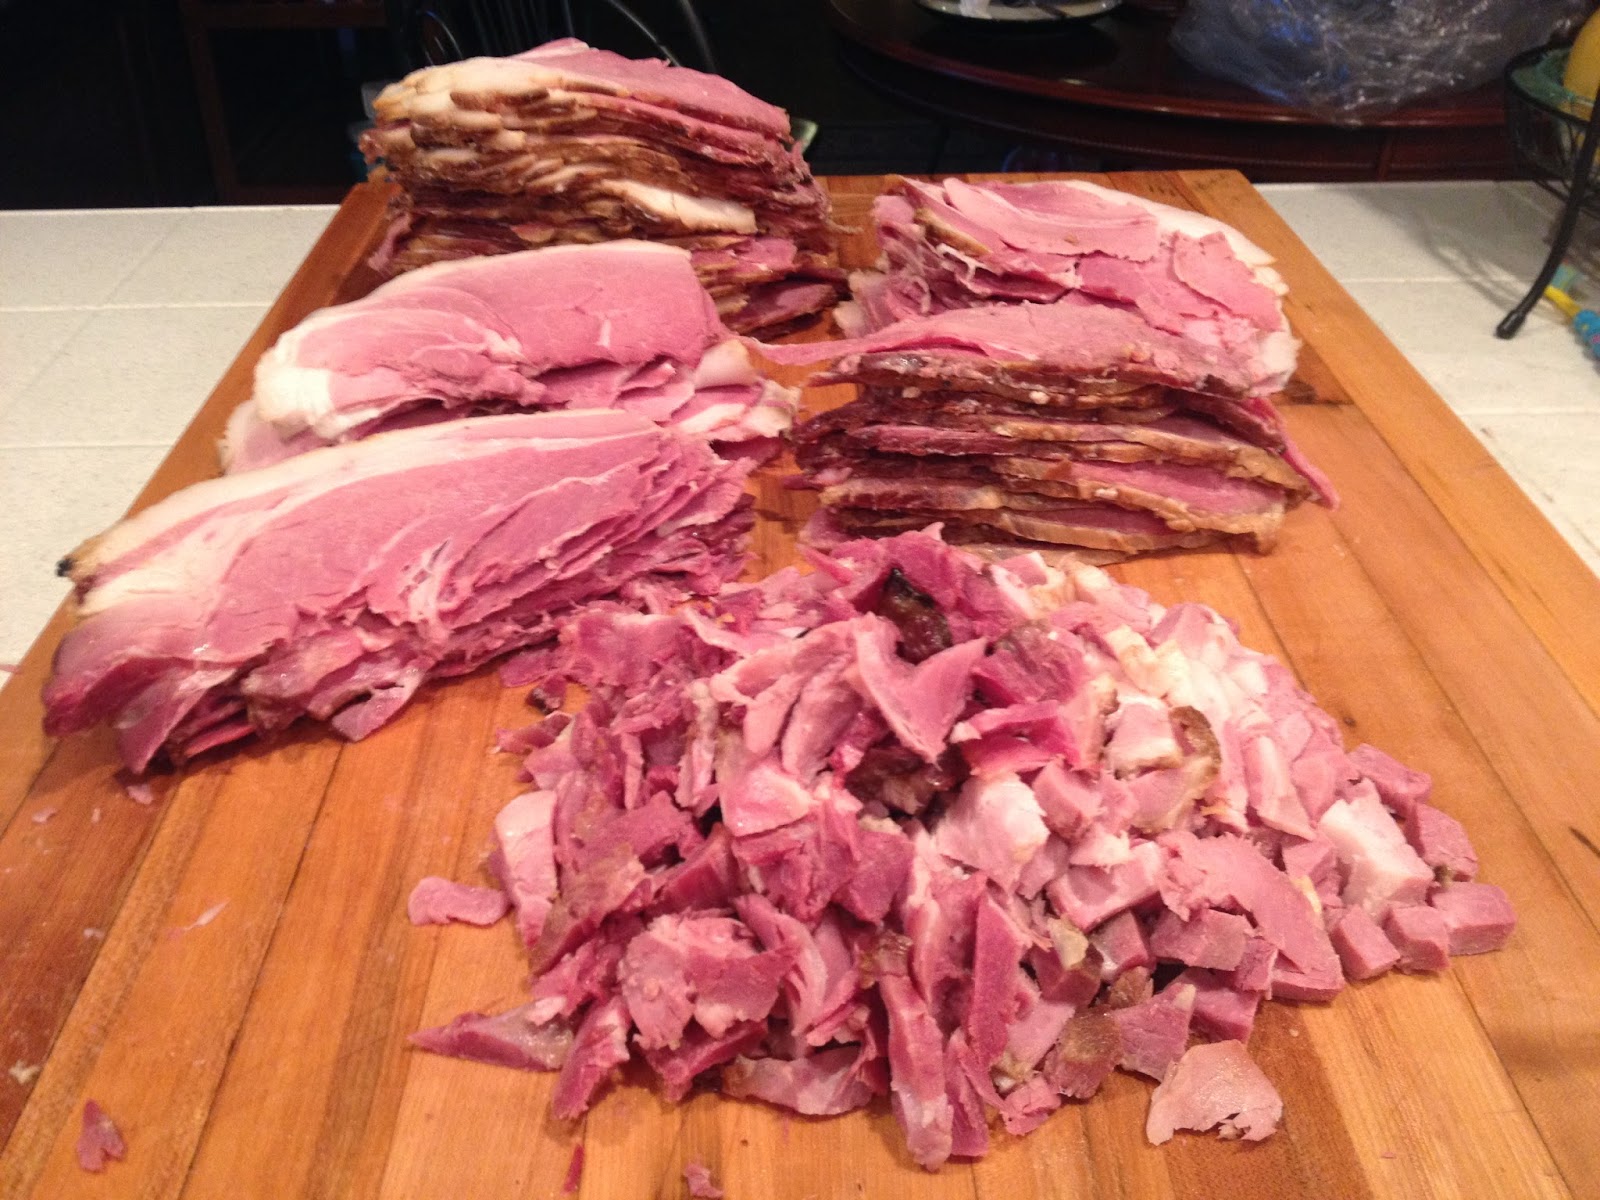
So, after carving off enough for dinner (which was delicious by the way), I was faced with putting it into the form of slices for sandwiches.

Admittedly, having a meat slicer here helped quite a bit.  I can see where having an even nicer meat slicer would be even better though as ours just isn't "cutting" it sometimes (HA!).  It always manages to pull some of the bottom part of the meat downward and not slicing it evenly.  This results in a lot of trim - which is okay in some instances because you can use those trimmings in other dishes.

Where's that loaf of rye bread?
I diced up all the trimmings as best I could and we'll use those for omelettes, ham/potato hash, or maybe even ham salad.

I gotta admit that I'm looking forward to having some sandwiches with this stuff.  What a great flavor and that fat tastes unlike anything I've ever had before.  You really can just eat it by itself.  Now I'm going to do more exploration of preparations that are done just with fat (lardo?) so I can leverage even more of that for the next hog we butcher.  While we've really enjoyed all the lard we rendered out, skillet frying up a nice slab of cured fat sounds like something I really want to be a part of!
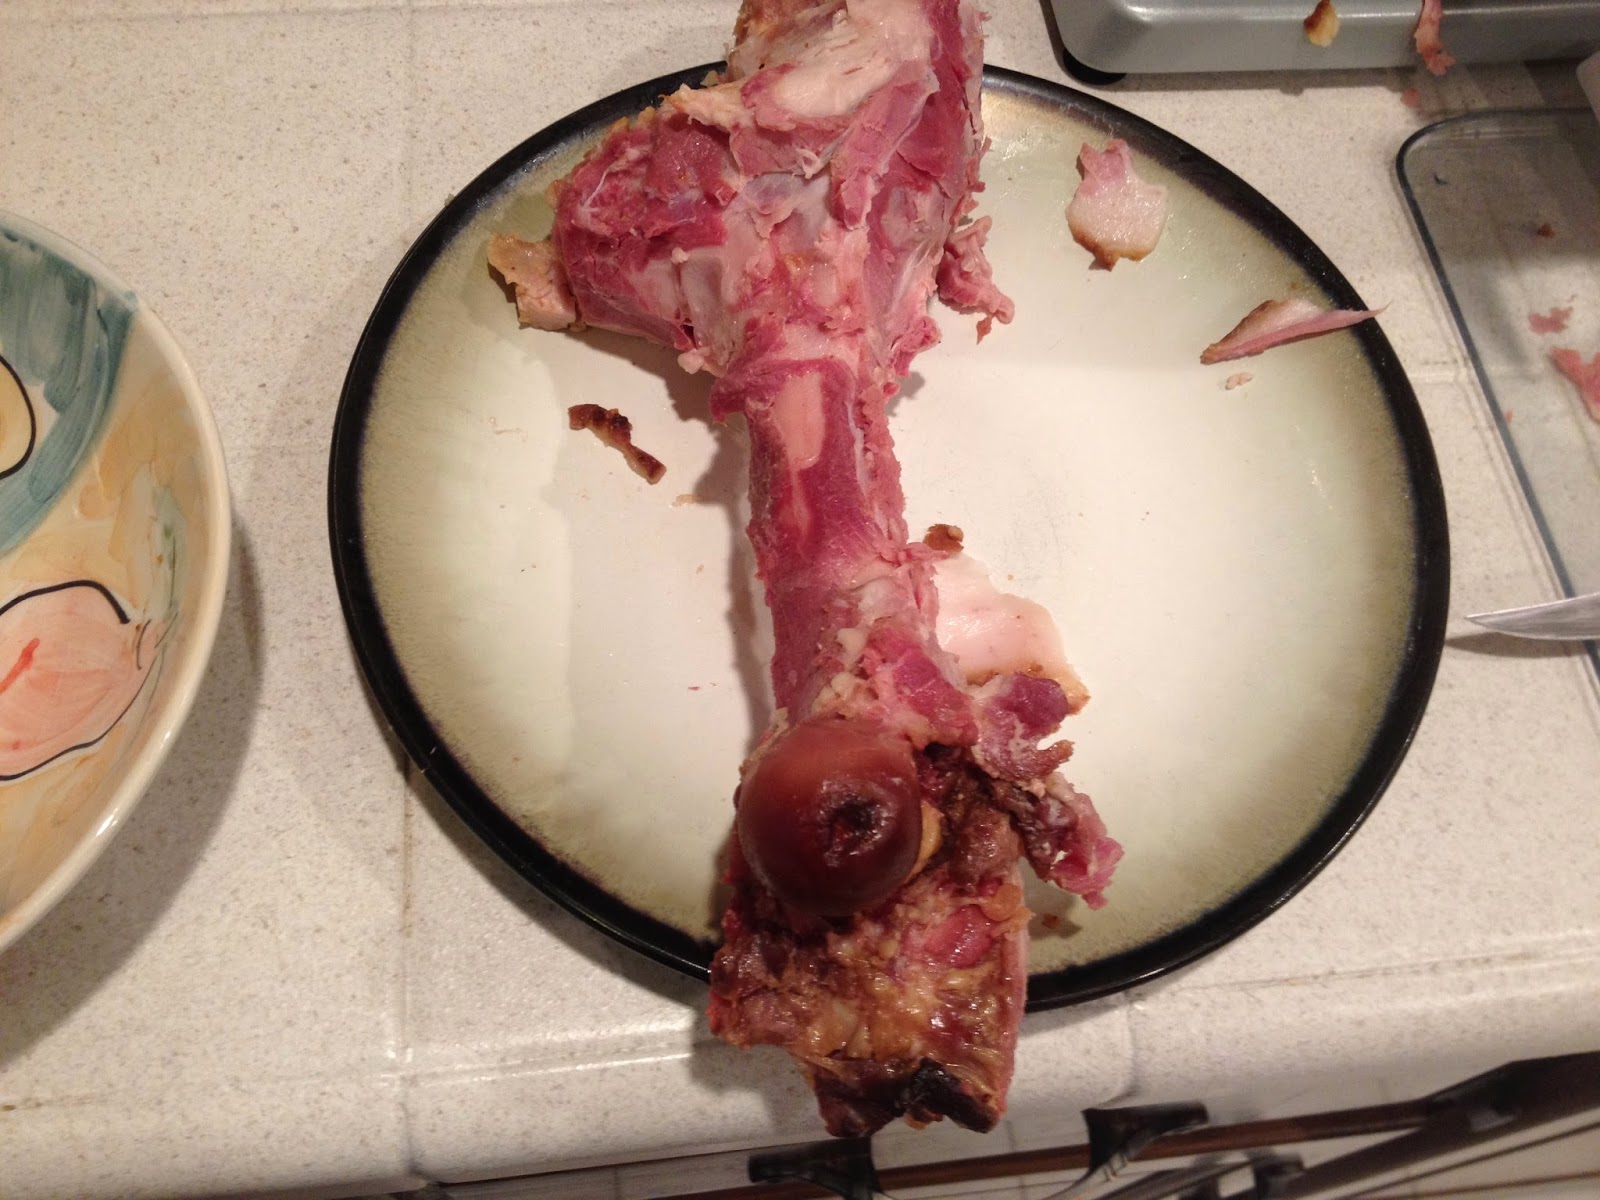
Holy Ham Batman!
I wish I weighed everything up after I vacuum sealed it.  I've eaten ham a couple of days for left overs from some of the larger chunks that I trimmed up.

So yeah, in hindsight, the only things I think I'll do different next time are;

 - try to trim the fat more uniformly and a bit thinner

- be sure to inject like a banshee!

- fry up a test piece BEFORE I soak it


Aside from that, I got this ham thing down.  Now, what do I do with this?

Split pea soup anyone?


Wednesday, March 11, 2015

The Last of the Bacon... For Now.

So the other two slabs of pork belly came out of the cure this past weekend.  These were brined using Pop's Brine from The Smoking Meat Forums website.  It's well regarded and from what he says, being a less salty cure, you can go past your target date a bit without going into "Too Salty" territory.


Happiness is a crisp morning with a smokin' Egg.
 Essentially, the recipe is pretty darn easy.  1 Gallon of cold water (obviously, the better the water you've got, the better off you are - I used tap water with the chlorine and fluoride filtered out), 1 cup non-iodized table salt, 1 cup regular sugar, 1 cup brown sugar, and 1 ounce curing salt (Cure 1, pink salt, prague powder 1 - there many different labels this stuff has - but we're NOT talking about Morton's Tenderquick or Cure #2 here).


26 hours of Apple smoke can put some color on your bacon!


Mix it all together (no reason to heat the water - it'll all dissolve just fine with some heavy stirring.  Pop says that for full bellies, you should go for between 10-14 days in the brine.  Since my bellies were a little on the thick side - just a hair over 2 inches at the thickest part - I went the full 14 days.

I pulled them from the brine and let them dry on a rack in the fridge for a day or so to get that tacky pellicle to form.  Then I smoked them over Apple wood for about 26 hours straight (I let it go all night) and then back in the fridge to get cold before slicing.


Pretty...

My meat slicer (the Edgecraft 610) gets a workout on this process.  I can say now that I understand why some say to just save your money and buy a used Hobart slicer off craigslist.  This slicer tends to pull the meat downward which seems to leave a chunk along the bottom that I find myself having to trim off.

But, the good news is that there is plenty of trim bagged up to use to flavor soups, stews, greens, and who knows what else.

I gotta admit, it sure is a neat thing to see piles of sliced bacon all over the counter waiting to get the vacuum pack treatment from the Food Saver.

Not from this batch.  But still pretty!
Okay - full confession mode here.  I can't believe this but I actually forgot to save a couple slices to fry up.  My wife and I were not feeling 100% due to a head cold that has been making its rounds and we were anxious to get the job done.

So, the picture you see to the left is the previous week's bacon... the stuff I said was a little on the salty side.  As soon as I've finished off cooking what is left of that bag, I'll thaw out a package of this week's bacon to see how different it is.

In the future, I'll need to remember to slice off a chunk when it comes out of the cure BEFORE hitting the smoker.  That way, if its too salty, I can soak it in cold water before smoking it to help draw out some of the salt.  I failed to do that on BOTH of these batches.  I'm such a rookie!

Tuesday, March 10, 2015

When In Doubt, Braise It! Beef Short Ribs

Thanks to Rocking Chair Ranch Cattle, there are several packs of grass fed beef short ribs from the half cow we got last year in the freezer.  They've been taunting me every time I open the door.  On the previous half cow we got, I opted to have the short ribs just done up in ground beef because I didn't know how to cook them.  This time, I told myself that I'd have to figure it out.  Alas, most of that half has been used up and we're getting down to the cuts that we tend to use the least (or don't know what to do with at all).  So, now it was time to put up or shut up with those short ribs.

As luck would have it, I recently listened to a podcast from the illustrious Chef Keith Snow from Harvest Eating.  In it, he described braised beef shanks.  I didn't have beef shanks... but I did have short ribs.  And darned if at the end of the episode if he didn't talk about other cuts you could prepare the same way, beef short ribs being one of them!

For those not familiar with braising, if you've done a chuck roast in a crock pot, you've essentially braised it.  I'll outline the process here.

A pile of short-ribs
Like any good braised short rib recipe should, it starts with the short ribs.  So... get some short ribs.  Short ribs are a pretty tough cut of beef - lots of connective tissue, fat, and such.  And with all that comes lots of flavor... like a chuck roast.

I had a couple packs thawed - about 4lbs or so.  Some of them were great big chunks, with a big bone and others were slimmer... all depending on which part of the rib that chunk came from.  Season with salt and pepper.

I heated up some lard from a recently butchered hog in an enameled dutch oven and browned the meat.

Sizzle...
There are some who think that searing the meat will trap moisture and keep it locked up inside the tissue.  I think the science actually proves otherwise.  That said, searing the meat DOES have value in the form of the "fond" that forms at the bottom of the cooking pot... you know, those little brown bits and fat that you eye suspiciously, wondering how much elbow grease it'll take to remove it from the pan?

That fond is a concentrated meat flavor that forms as a result of a process called the Maillard reaction.  And you want to preserve as much of that as possible.

So after you've nicely browned your meat, remove them and set aside in a bowl.  Toss in a couple chopped carrots and onion into the pot and cook until tender.  You don't have to go full on carmelize mode - but some brown isn't a bad thing.  Add some other aromatics here as well - minced garlic, thyme, rosemary... whatever works well with your tastes.

Now, toss in some tomato paste - a couple tablespoons and keep it moving in the mixture.  Everything should get pretty sticky and really start to brown onto the cooking surface.  Act fast here to make sure you don't over cook it and scorch the paste that gets stuck onto the sides and bottom of the pot.  Just when you think you're about as far as you can go without burning, start stirring in some red wine (a cabernet perhaps - or whatever you have left in that bottle from last night).  This will deglaze the pot (meaning remove all those brown bits that have been getting stuck to the surface) - help it along with a wooden spoon to be sure you've scraped up all the fond and gotten it up into the braising liquid.  I added about half a bottle of wine.

Get braising, you little ribs!
I then nestled the ribs back into the pot, trying to arrange them in so that they were pretty well packed in.

I had so many short ribs in the pot that I needed to add some beef broth so that most of them were covered.  I had a few poked up out of the liquid - which is good.  As they braise in the 250 degree oven (which you should be preheating by now), the ones sticking up will brown further, giving us even more flavor.

Make sure you have a really good heavy lid that seals well.  Le Cruset dutch ovens are good for this.  Cover the pot and put into the oven.  You'll know if you lid is any good when you check it after an hour and it doesn't appear that any liquid has cooked off.  If it has, be sure to add some more wine or broth.  Total cooking time should be at least 3 hours.  Four is better and five is great.  Much more than that though, and you'll probably start to dry the ribs out.

Time to skim the fat.
You can tell when you are getting done. Things should start to look like this and you'll be able to pull the meat right off the bone with no effort.

The fat should have rendered out a lot.  Skim the fat as best you can.  This is one of those dishes that works even better the next day so if you have time to wait, let it cook down on the stove top and then toss in the fridge over night.  When you remove it tomorrow, you'll be able to lift the solid fat out with a spoon or fork with no trouble before you heat it all back up.


Round these parts, we call 'em grits!
Tradition would dictate that this dish be served with mashed potatoes.  I didn't have any.  So I made creamy corn grits (or polenta for those of you so inclined) and served it over that.  Rice would work in a pinch too.  Just remember that this classic comfort food.   And while you could serve it along side some sauteed kale, you're missing out if you don't hit the starch hot and heavy with this dish.  The sauce is too tasty to let go to waste on a bare plate... get some bread in there and sop it up!

I've made this dish twice and have just about used up our short ribs.  A chuck roast would be good this way... Next time, I'll ask for the beef shanks and save them from the grinder.

Monday, March 2, 2015

Bacon is the Word. Help Spread the Word!

Benjamin Franklin once said that beer is proof that God loves us and wants us to be happy.  I'm inclined to agree with him on that count but I propose that he also meant to include bacon in that statement but ran out of ink for his quill.  Furthermore, being a Christian, I often rejoice at Christ's gift of deliverance from Kosher law.  Without which, I'd be stuck with corned beef (which is no bad thing in and of itself, of course).

Salt cured pork belly, otherwise known as bacon, has experienced quite the increase in popularity of late.  And its easy to understand why.  It's mind boggling just how good it is; with chocolate, with pancakes and syrup or just by itself.  Salty goodness with pork fat!

I tried to make bacon a couple years ago.  I was brand new to meat curing (well, I guess technically I still am, but I've made corned beef a couple times and even a pastrami) at the time and it looked so easy from Michael Ruhlman's book, "Charcuterie".  You just rub a big pork belly down with a mixture of salt, sugar, and curing salt, stick it in a ziplock, wait a week, and you're done.  After that you can cold smoke it, hot smoke it, or fry it up as is.  What could be easier.


I tried it.  And the results were... salty.  Like WAY too salty.  Not to mention that I'd intended to hot smoke it in the Big Green Egg until it reached about 150 degrees.  But it rained the night I was planning to do it so it went into the oven to cook.  But I left it in too long and it got to about 175 degrees...  to make a sad story short, I chunked it as inedible.

Fast forward to a couple weeks ago and my first adventure in pig butchery.  I now had about 12lbs of pork belly to figure out what to do with.  As I mentioned in this post about my post butchery plans, I was going to do bacon in two different methods.

This time, per the advice of another bacon maker, I used Ruhlman's basic cure mixture at a ratio of 4% by weight to the belly.  I can't remember what this section of belly weighed but lets say it was about 4lbs or 1800grams.  4% of that weight would be 1800 grams x .04 = 72 grams.  So using that method would call for 72 grams of the basic dry cure to be rubbed.  So... that's what I did.

Then I put it in a ziplock bag and put it in the fridge to sit for 7 days.  Over that time, I flipped it everyday.  From other descriptions of the process, I expected the cure to draw out a great deal of moisture which would form something of a brine in the bag.  However, I didn't experience that at all - as a result, flipping the bag every so often was kind of pointless (as the idea is to make sure that all sides of the meat spend quality time in the brine).  However, I could tell the meat was curing as it was getting quite a bit firmer.  By about day 3 or 4, it was pretty rigid.

Rinsed and dry
 After a week, I removed it from the bag and rinsed under cold water and then patted it dry with a towel.  Then I let it sit over night uncovered in the fridge to form a pellicle.

A pellicle is a tacky film of sorts that will form on the surface of meat as it dries.  Its very helpful in making sure the smoke adheres to the meat.  If you smoke wet meat, you wind up with something that sort of looks like splotchy ashes.

So, into the fridge it went.  The next morning, I pulled it out and it felt tacky as I'd hoped.  Unfortunately, I learned a little something about my fridge.  I'd put the belly on the top most shelf (as the whole bottom of the fridge was filled up with brine buckets), right below where the cold air comes in from the freezer.  So there were a few parts that got overly dry and I wound up trimming those off.

After 12 hours of cold smoke

After resting in the fridge after a day of smoke

Sliced bacon is a lovely thing

Trying out the new slicer.


Then I started up the smoker (my Big Green Egg combined with an A-Maze-N Pellet smoker tray) and in the bacon went for about 12 hours.


After coming out of the smoker (which had a blend of hickory, apple and maple pellets), I let it rest in the fridge (not the top shelf this time) overnight.


I fried up a slice in a skillet to see how it came out.  While a little saltier than I'd prefer, it had great flavor - strong pork flavor with a touch of sweet/salt.  My wife (who is less sensitive to salt) loved it.


I got to give the new meat slicer a workout.  While it wasn't perfect, it certainly sliced in better than I could have with a knife.

Certainly the thinner the slice, the less salt you get in every bite.  Slicing it by hand would have yielded slices that were too salty for me to enjoy so having the meat slicer kind of saved me,


I vacuumed up 1lb portions in the Foodsaver and then put all the trim/end pieces in another pack to use in beans or soups and such.  Too nice and smoky a flavor to toss out.

All in all, I'd call this a great success.  The cold smoking process is easy with my rig and I think it really adds a great flavor.  I meant to take a picture of the final product fried up but I was too busy eating it!

As a side note, since this bacon is cold smoked, its not safe to eat until fully cooked.  So when handling it, treat it as if it were raw (in terms of cleaning up and washing hands etc...).

I still have two more slabs in a brine that I'll give the same treatment to later on this week.  This time I plan to smoke a little longer and with just maple pellets.  Looking forward to it.

The problem will be having the patience to wait until I can try all the different recipes for bacon that are out there.  Maple extract, bourbon, brown sugar, molasses, jalapeno...  Too much bacon, not enough time!


Friday, February 27, 2015

Lessons Learned - Observations of a Novice

So now that its over (or at least the butchery and initial curing is over), what do I think?  Was it all I dreamed it to be?

Well, I gotta admit that when I finally sat down that first night, I was WAY more tired than I expected.  I remember thinking that perhaps next time, I'd let the processor do it.  But after a day or two and lots of reflection, I came to the conclusion that there were lots of areas that could be done better now that I had some experience.  And if I could incorporate lessons learned, it would make the next time that much easier.

So what are the lessons learned?  In no meaningful order, I'd have to say that I learned the following and would advise anyone who was trying this for the first time to consider these:

- Work.  Its way more physical than I expected.  Muscles get used that don't normally get used.  And its a good thing that the parts get lighter and smaller as the day goes on.

- Help is a good thing.  That said, it should be purposeful help.  I had lots of help but I wasn't familiar enough with the process to set anyone to working on a task.  Next time, I'll have one person cubing the lard and another person vacuum sealing as we go.

- Prep.  Make your brines ahead of time.  Make your cure rubs ahead of time.  Mix your spices for sausage the day before.  Anything you can do ahead of time to avoid having to mess with it on the day of, the better.

- Work the Bugs out.  Meaning, get all your crap together.  Don't wait until you have a fridge full of brining hams and bacon to decide you need to defrost that fridge so it doesn't go belly up 15 days into the ham curing.  Familiarize yourself with any new processes and equipment.  Butcher day isn't that day for trying out your new FoodSaver.  Play with ahead of time.

- Bowls.  You don't have enough,  Trust me.  I know, you just went to Costco and got two new stainless steel bowls... big ones.  But, you'll need four.  If you have four, you'll need 5.  Its a universal law of the universe or something.

- Space.  See above.  You won't have enough.  Get the fridge cleaned out ahead of time.  Its going to fill up fast.  If your freezer is full of three year old pop-sicles and the person who is putting that pork in the freezer doesn't know it can be tossed, they're going to come back and tell you there is no room.  Now you have to wash up and go see.  So yeah, toss the ancient Stouffers stuff ahead of time... you shouldn't be eating that crap anyway!

- Bar towels.  You'll go through them like crazy.  Get a dozen more.  They are cheap at Sam's.

- Saw.  I need another one.  Maybe a shorter one with a less finer toothed blade.  Mine sucks.

- Knives.  If you are going to have someone else cutting up fat for lard while you make chops, then don't make them use the dull chef's knife in your drawer.  Get them something decent to use.  It'll be much cheaper than a trip to the ER because they were trying to do the right thing with the wrong tool.

- Be flexible.  Having watched a ton of different videos helped to give me the aforementioned analysis paralysis.  But, it also gave me enough knowledge to zig when I'd planned to zag.  You just have to know when to stop trying to force something to happen and punt!  In the end, you still wind up with pork.  And that's not a bad thing.

- Enjoy it.  You've spent some time, effort, and money to get to the moment where that hog is on the counter.  Take a moment to stop and smell the roses (err.. pork).  This is supposed to be enjoyable.

So will I do it again?  Yep - no doubt!  The longer I go the more it feels like Army basic training.  While you are in the middle of it, it seems a miserable experience.  But after you are done you think, "That wasn't so bad."  I don't mean to make this sound like it was a miserable experience at all.  But I think I'd built it up to be such a complicated monster of a process that it was like child-birth or something.  It was great fun and I learned SO much.

Next time, I'll take some of my own advice, streamline the process, do some different things to prepare, and have even more fun because it won't seem so foreign.

I highly recommend this journey to anyone who has a predisposition to wanting to know your meat as well as your possibly can (short of raising and slaughtering it yourself).

I hope these articles will be useful.  I tried to write them to be what I'd wished I'd been able to find when I was researching the process.


Second Day - Curing/Rendering/Sausage

After a much needed night's sleep, it was time to get down to the business of processing.  I gotta tell you, I was beat.  Once the cutting and such had been completed the night before, there was a great deal of clean up.  My wife had embraced the idea of the me butchering a hog on her counter.  It would have been unproductive to leave bone dust and fat scraps all over the counter and the floor.

But there were lots of bowls containing lots of pork parts in lots of places in several fridges.  I needed to get them "working".  After all, you can't EAT bacon until the bacon is done being made... and nobody else was going to make this bacon, but me!

*I actually didn't do all this on one day - some lard was done on one day and the rest the next.  Sausage was made on one day and then smoked the next - so technically, this entry encompasses two days for those of you who are paying too close attention.*


I started with the leaf fat.  I wasn't going to use any of that for sausage. Apparently it is too hard for sausage and doesn't work well being instead prized for biscuits and pie crusts.  So I diced it up into smallish chunks and tossed it into the crock pot.

Leaf fat in the slow cooker

Covering and setting the cooker on low will, over the coarse of the whole day, turn the fat into lard.  It helps to put 1/4 cup of water into the bottom so that as the initial fat starts to melt it doesn't start to scorch or burn first.  Once everything is starting the cook down and become liquid, cant the lid open a bit to let the moisture evaporate.
Floaty (is that a word?) bits

Here it is after several hours.  For what its worth, I removed the skin before I rendered this out.  What is floating around in there are essentially the "husks" of the above cubed fatty chunks.

Think of them like bacon.  You have the meaty part and the fatty part.  When you fry it up, the fatty part doesn't really disappear leaving you with a couple slivers of meaty parts.  It still holds some sort of structure.  These little bits are essentially the outside structure.

Strained floaty bits

Here are some of said floaty bits on a paper towel.  I'm not quite sure what to do with them.  Are they cracklin'?  I thought they were.  Some say that cracklin' is instead the skin that is left on when rendering lard.  I thought those were pork rinds.

Who the heck knows... I've got to do some research on this.
Hot rendered lard in canning jars.
 After the fat has rendered down, I killed the heat to the crockpot and strained it through a cheese cloth lined strainer and then put it into jars.

Make sure you don't skip the straining step.  Any little chunks and floaty bits that you leave in the liquid fat with cause it to go rancid that much sooner.

Let it cool on the counter and then put it into the freezer or fridge until ready to use.

Both types after cooling (left is back fat lard, right is leaf lard)

I repeated the process with the back fat.  I wound up with 4 pints of leaf lard and 2 pints of back fat lard.

To the right is a side by side comparison.  The whiter jar on the right is the leaf lard.  It should have much less pork flavor than the back fat lard on the right - which is why it is preferred for baking.

We used some leaf lard in some corn bread the other night and I have to say, it was excellent.


Getting some help mixing spices

Now it was time for the sausage.  I planned to do about 10 lbs of cold smoked kielbasa.  I had 5 lbs of grass fed beef round roast and about 4 lbs of pork trimmings and a pound of back fat.  After mixing up the spices.  The meat was ground, mixed, and stuffed into hog casings.

They dried in the fridge over night to develop a pellicle - which is the tacky sticky "film" that develops when meat starts to dry out.  This is what gets the smoke to adhere.  If you casings are still wet when you try to smoke them, you'll get bad results.


Getting smoke... 

I planned to cold smoke the kielbasa.  I understood this to be a way to get much more mellow and deep smoke flavor.  Since there was a curing salt in the sausage I wasn't worried about letting them sit in warm (55 degrees) Big Green Egg for 10 hours or so.

The Big Green Egg is a little tricky to convince to smoke without generating heat.  After all, I wanted to smoke the sausage, not cook it (I'd cook it later once I'd applied lots of smoke to it).  So, I used something called an A-Maze-N-Pellet Smoker.


A-Maze-N Pellet smoker in the bottom of the Big Green Egg

 Its a pretty slick little thing.  You fill it with your choice of wood pellets and light it.  Provided it has enough airflow, it creates a nice stream of steady smoke for more 12 hours (which was more than I needed).  AND, it generates about as much heat as a lit cigarette.

I hope to tinker with using it to smoke salmon and cheese at some point.  But for right now, I'm still in pork mode.


After 10 hours of cold smoke, the sausage went into the fridge to rest.  I see people say that this lets the sausage equalize the flavors and such.  For me, it was more that it was late and I was ready to hit the sack.

The next day it rained and so I just cooked the sausage in the oven to an internal temp of 150 degrees.  Cut it into sections and vacuum sealed it up.


Sadly, I have no pictures of brining the bacon or the ham.  The brine recipe comes from a well regarded source on The Smoking Meat Forum website.  It's called Pop's Brine and seems to yield good results and has a loyal following.

I injected the ham with a good bit of the brine and put it in a 5 gallon food safe bucket and covered it in two gallons of the brine, weighting it down with a big zip-lock filled with water to keep it under the brine.

For the three bacon sections, I put two of them in another bucket with the same brine (1 gallon) and weighted them down the same way.  The other section was rubbed down in a curing mix taken from Ruhlman's book "Charcuterie" that I mentioned in another post.  It is regarded as being overly salty but I had some guidance from a Facebook post (Thanks Mark!) to just use 4% of it based on weight.  So if the meat weighed 2000 grams (2 kilograms) then 4% of that would be 80 grams of basic cure mix to rub the meat down with.  Put it in a tightly sealed zip lock back and stick in the fridge.  It will draw moisture out and almost make a brine so be sure to flip it daily so that all sides get plenty of time in contact with the brine.  After 7 days, you pull it out, rinse it off and let it dry in the fridge (that pellicle thing again!) before you smoke it.

The cure-rubbed bacon after a week.

I realize I am fast forwarding a week here with this picture but here is the piece of bacon after it was rinsed and dried off.

It's sitting the fridge as I type this and will go into the cold smoker tomorrow morning for most of the day.  Hopefully it comes out well.  But if not, there's two more curing in a brine that will be ready in about another week.